Blog
Is Your Dental Sterilization Area Setup Efficient — or a Bottleneck?
3 Ways to Improve the Efficiency and Safety of This Critical Space
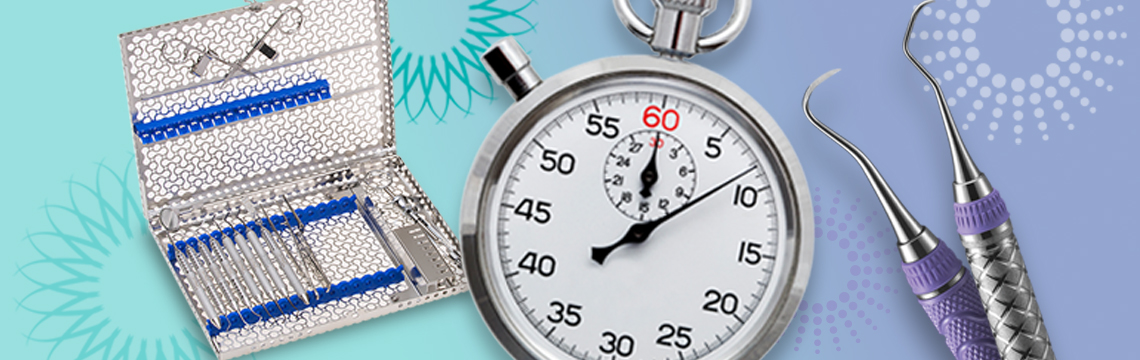
 What would you do with five extra minutes per procedure in your dental practice?
Imagine how those extra minutes could pile up over the course of a workday, a week, or a year. You could use them to spend more time with patients, add more patients to your practice, or simply allow your deserving staff to leave work at a respectable hour.
But, where can you save five to 10 extra minutes for every procedure? For many dental practices, the answer lies in their sterilization area. All too often, disorganization in this critical space creates a bottleneck that extends to the entire practice.
One clear indicator of a disorganized sterilization area is loose instruments. Loose instruments are handled more than they should be and can be misplaced, dropped, and damaged – which means they must be replaced sooner. They can inflict sharps injuries to the team members who clean, arrange, and transport them. And they can be set down in the wrong places, which can promote the spread of infection.
These missteps cost precious time to correct and unnecessarily risk the health of staff and patients. If you find your team must frequently stay late, patient wait times are creeping up, infection prevention standards are dropping, or instrument replacement costs are climbing, it might be time to reconsider how you organize your sterilization area.
On the other hand, if your practice has yet to experience these symptoms, think about what’s coming ahead in the future. As your practice grows, your instrument processing area will play an increasingly important role in establishing and maintaining the efficiency of your practice. Take the time now to implement best practices and ensure you’re prepared for future growth.
Consider these three ways to improve the efficiency and safety of your sterilization space:
1. Give Your Sterilization Area the Space and Location It Deserves
Your practice’s sterilization area is a hub of activity with the dental assistant entering and exiting it 80 to 120 times per day. Every instrument your practice uses cycles through it constantly for cleaning, packaging, and sterilization.
Yet, in many practices, the sterilization area gets short shrift. It’s relegated to an out-of-the-way corner or it shares cramped quarters with other practice functions, such as the laboratory.
Office space comes at a premium, especially in pricey urban areas. So, we understand why a practice would balk at expanding or taking space away from administrative areas, operatories, or reception. But undersized, poorly located sterilization areas can cause problems:
- Team members waste time and risk injury when transporting instruments to and from sterilization areas that aren’t centrally located.
- When sterilization areas share space with other functions, team members jostle each other — risking accidents and damage — or must wait their turn to access sterilizers. Cross contamination is a high risk in this scenario as well. Processing of soiled and sterilized instruments cannot be properly segregated into separate areas, risking cross-contamination.
 Instead, the U.S. Centers for Disease Control (CDC) says the space in your instrument processing area “should be adequate for the volume of work anticipated and the items to be stored.”
Ideally, try to locate this area near treatment rooms to minimize travel times. Make sure the room is wide enough to allow staff members to pass each other comfortably. Having two entrances to the space will also improve the flow of traffic and minimize bottlenecks.
2. Segment Your Sterilization Center According to Functions
Once your sterilization area is in an accessible location with plenty of room to operate, you need to subdivide it into well-defined areas. Each area should be used only for its intended function.
A divided sterilization space will clearly define the flow of instruments, from a “dirty side” to a “clean side.” This will increase efficiency and prevent soiled material from contaminating sterilized instruments.
The CDC says your instrument processing area should consist of four sections:
- Receiving, cleaning, and decontamination.
- Preparation and packaging.
- Sterilization.
- Storage.
To control traffic flow and contain contaminants, each section of your sterilization area should be separated by walls or partitions. But, the CDC acknowledges this is not always possible: “[A]dequate spatial separation might be satisfactory if the [dental healthcare professionals] who process instruments are trained in work practices to prevent contamination of clean areas.”
Click here for some CDC-approved infection control tips.
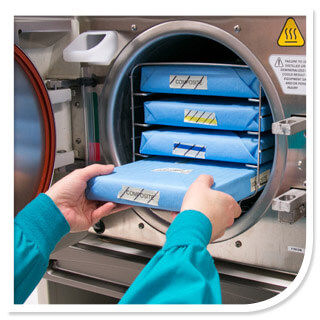
3. Upgrade Your Tray and Pouch System to Cassettes
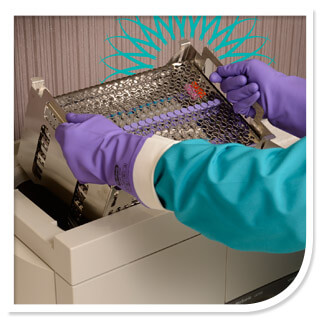
Even the most well-situated, perfectly divided sterilization space can become a chaotic mess when you process loose instruments.
Loose instruments can slide off uncovered trays during transportation and can spread contamination if team members collide. Dropping them in and retrieving them from cleaning equipment requires dangerous and inefficient manual handling. Sorting prior to pouching, storing, and finding the right instruments for each procedure can be time consuming and dangerous. Trays cannot be placed in automated cleaning equipment or sterilizers, requiring an additional step of disinfection and separate storage.
By switching from trays to cassettes, you can eliminate all of this.
An article in RDH Magazine tells the story of a Chicago dental practice that was consistently running behind due to pervasive problems in the sterilization area. Rapid growth in the practice meant instruments were constantly being processed, but the poor layout of the sterilization area created a bottleneck for instruments, increased risk of cross-contamination, and continually overloaded ultrasonics and sterilizers. As a result, sterilization protocols often weren’t properly executed, which led to wet bags, time wasted searching for missing instruments, and escalating costs to replace damaged or broken instruments.
To turn things around, the practice committed to remodeling its instrument processing area. The remodel project included, among other things, switching from loose instruments to Hu-Friedy’s cassette-based Instrument Management System (IMS). The practice used the cassettes to standardize instrument setups for common procedures.
Almost immediately, the practice began to see impressive benefits:
- Standardized instrument setups for common procedures enabled the practice to save as much as five minutes per procedure.
- The standardized cassettes also enabled new and temporary staff to quickly get up to speed.
- Instruments were no longer damaged or lost during processing and transportation to operatories.
- The cassettes loaded easily into the practice’s new sterilizer and dried quickly.
Dr. Lou Graham is quoted in the article with high praises for the results they achieved. “For practices considering enhancements or remodeling, I would highly recommend seriously considering improving your sterilization area,” he says. “Your office can reap huge benefits from redesigning an inefficient sterilization area to one that is efficient and systematic.”
Is There Room for Improvement in Your Dental Sterilization Area?
If the efficiency of your dental office is slowing to a crawl, instruments are getting damaged or lost, and your infection prevention standards are slipping, your sterilization area may be the culprit. How sterile is your area? Take our sterilization quiz to find out.
It should only take a minute, and when you’re done, you’ll have a full report on how your practice is performing and how you can do better.
Blog Comments
Cassettes
Instruments are supposed to be wiped and dried before going into the sterilizer, how does this happen with cassettes?